Balands National Park

Wednesday, June 26, 2024

Modifications

The Sink 

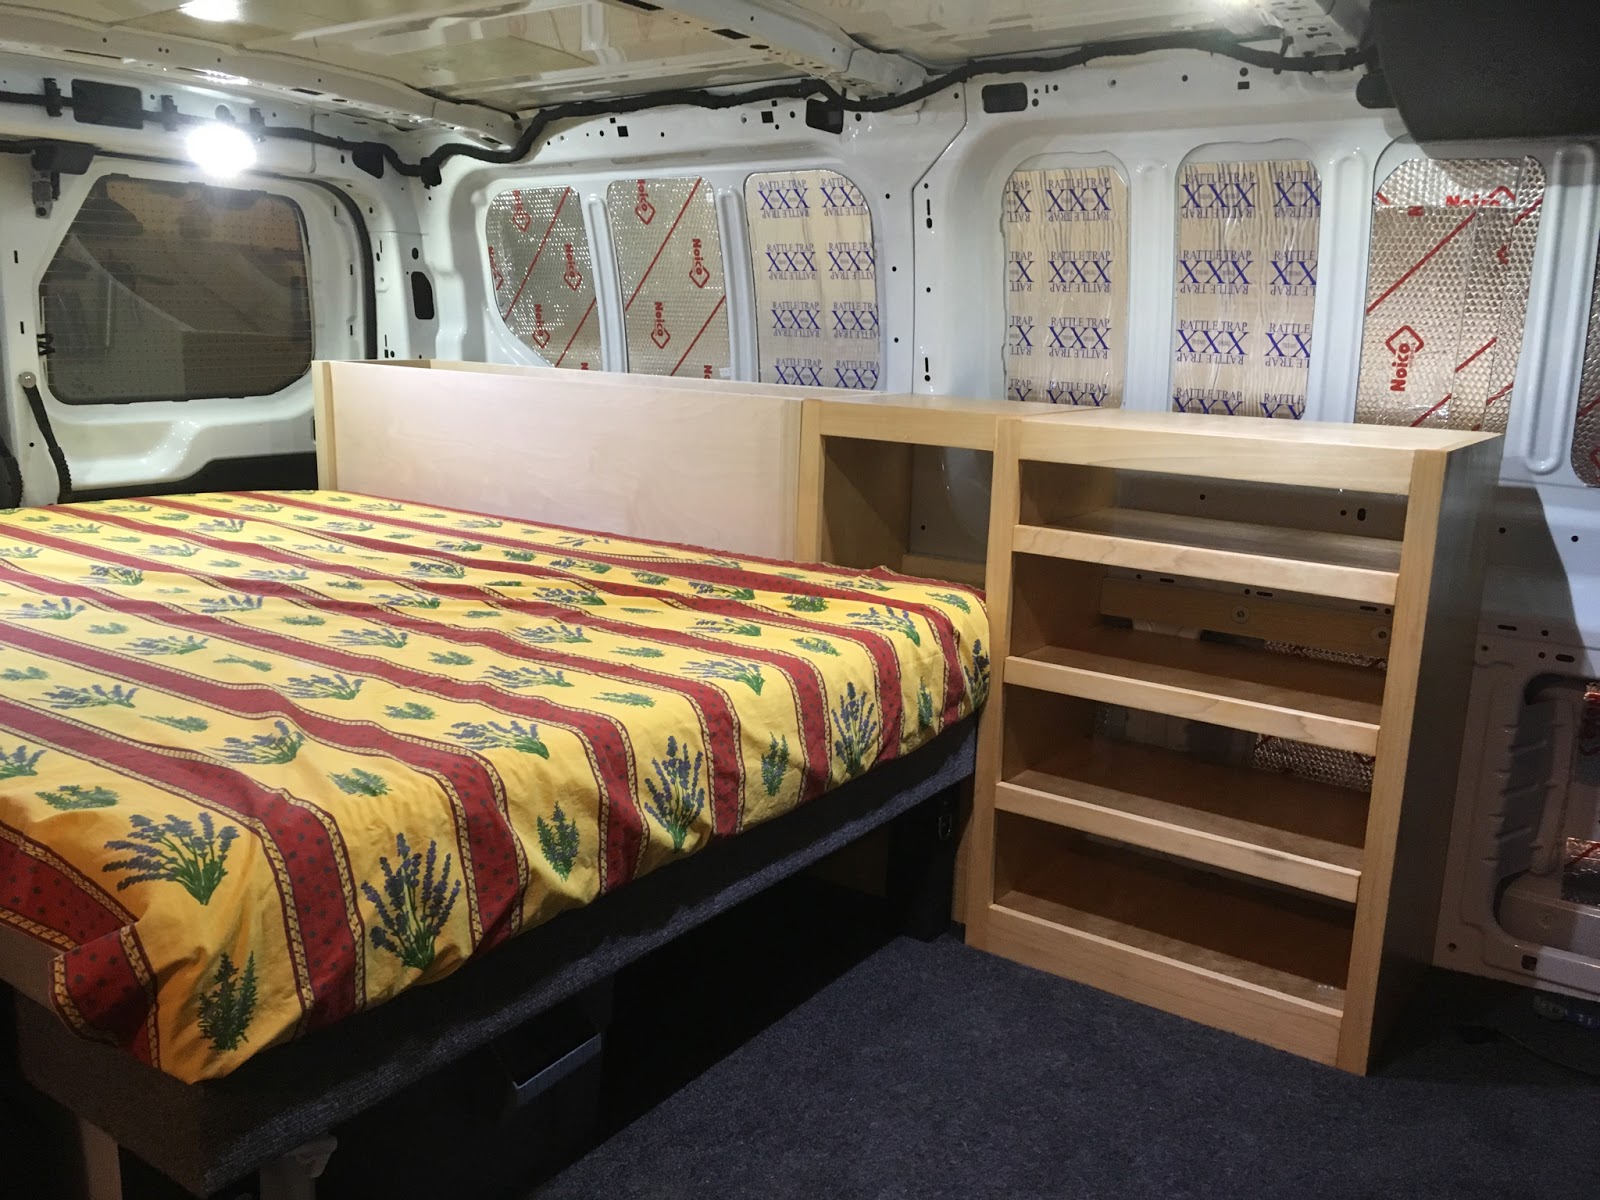
Over the years we've made a few modifications to our original design.  One was a stand-alone sink cabinet that included a wash basin, a pump, fresh water storage, and additional storage space.  


For a faucet/pump we purchased the Whale Flipper Pump from Amazon.  


For fresh water storage we alternated between 10L and 20L Scepter jugs and connected the jugs to the pump using CPC (Colder) fittings, and 1/2" tubing.  Grandson Jack is testing the pump.


The addition of the sink cabinet required us to come up with a new design for a smaller dining table, and for that we turned to a Lagun mount system.which is used my many camper van and RV companies.


As much as we liked the sink cabinet we felt it created a crowded floor space in our van, so we eventually removed the cabinet, and attached the Laguna mount to the bed post closest to the sliding door.  The Laguna system allowed us to rotate the table to accommodate both of us for dinner, and still allowed us easy access to the sliding door.


Next we purchased an 11 liter Domestic fresh water jug with an attached battery operated electric pump. 
                        

We cut a hole in our driver side countertop for our wash basin/sink, and mounted the pump next to it, We also have the option of locating the fresh water jug in the footwell of the passenger side sliding door and mounting the pump on our dining table.


The Portable Toilet

Although we have very rarely used the Luggable Loo porta potty we decided we would like it more accessible. Yet once we removed the sink cabinet we did not have a place for it.  The 5 gal bucket of the Luggable Loo was too tall to fit under the bed, but after a lot of online searching we found a shorter PVC bucket on Amazon that worked.  


At 11.2" in height our porta potty fits easily under our bed.  We line our porta potty with Double Doodie waste bags which are available from REI and Amazon.


Sunday, June 24, 2018

Our Inspiration

In June 2015 we purchased a used 2000 Volkswagen Eurovan Winnebago Camper.   It was in great shape and we enjoyed it for two seasons before selling it in December 2016.

We had some fantastic trips with this vehicle throughout New England, Michigan's Upper Peninsula, Gettysburg National Military Park, Nova Scotia, & Newfoundland.

These two years provided us with a great perspective from which we could build a new van.  We wanted a new vehicle with:
  • more power, 
  • more ground clearance,
  • more storage space
  • wider, more comfortable bed,
  • easier to find parts and repair
...and still fit in our garage!


Fairyland Harbour, Newfoundland

Meat Cove, Nova Scotia


The Van We Ordered from Ford:


Transit 250 Low Roof Van, MSRP=$39,700
130” wheel base
3.5L EcoBoost V6 w/twin turbos
3.73 limited slip 
fixed passenger slide glass
heavy duty alternator
dual heavy duty batteries
high capacity upfit switches
power inverter
running board passenger door
rear window defogger
short power/heat side mirrors
interior upgrade package includes:  

·      Complete rear trim including LH/RH full-height polypropylene panels
·      AM/FM stereo, audio input jack, 4" multi-function display, Message Center (level 1 instrument cluster), SYNC®, leather-wrapped steering wheel with controls for audio and multi-function display.
·      Cruise Control
·      Vinyl Flooring, Front and Rear

Delivery Time:  Approximately 10 weeks.  We ordered the van on December 3, and it was delivered to us on February 22.

What we should have included in our order?
·       remote keyless entry keypad:  We added this at our local Ford dealer.  This eliminates the worry of ever locking yourself out of your van while camping in the middle of nowhere.  It provides great peace of mind!
·       remote start:  This would allow you on cold mornings to start your engine with the heater running at full blast without getting out of your sleeping bag!


Sportsmobile Modifications

We took our van to Sportsmobile North in Huntington, Indiana, where we had the following items added to our van.  They are not cheap, but the quality of their products and their workmanship is outstanding.

Penthouse Top
Sliding Window with Screen on Driver Side
Full length Thule Tracks on Roof
Fiamma 45S awning-10 ft.
Swivel Seat for Passenger

When we arrived at Sportsmobile's shop, every part was laid out, ready for installation.

We left their shop at 8AM, and they invited us to return at noon to inspect their progress.

Amazingly the Penthouse was already attached, the hole for the window was cut, and...

the swivel on the passenger seat was installed.

The following morning, everything was finished and we were on our way!


We couldn't be more satisfied!


Saturday, June 23, 2018

Our Bed

After sleeping on the 42" wide rock-n-roll bed in our Eurovan, one of the highest priorities for our new van was to have a comfortable bed.  Even after we purchased a 2" memory foam topper for our VW, we weren't satisfied.  Although we have three children, they're now full grown adults, so when we go camping there are only two of us, so we don't need a rock-n-roll bed so that we could transport any additional passengers.

Which way to position our bed?
Knowing that we wanted a full size bed the next decision was which was to mount the bed, parallel to the length of the van or perpendicular?  Since the inside dimension of the Transit is only 69" wide and I'm 72" tall, and window flares were not available for the regular wheel base/low roof transit, we decided to stick with the typical Westfalia floor plan.

In order to locate the bed as close to the rear doors as possible we had to cut off a corner of the bed, and then for aesthetic reasons, we cut off the corner on the other side to make the bed symmetrical.


All of the materials for the platform bed were purchased at Home Depot and the total cost was $96 including the 2 sheets of plywood, 2'x4" x 8', carpeting, and adhesive.

For a mattress we selected  a 6" memory foam (Bob-O-Pedic).  $300

The cover on this mattress has a zipper, so it's easy to remove, and after making a simple fixture, I used an electric carving knife that I bought at Walmart to cut the two corners.

We modified the cover with some hand-stitching,

 and then used a quilt to cover the mattress, and at night we use sleeping bags on top of the quilt.

The height of the platform (11.5 inches) was designed so that we could store four 14 gallon  Rubbermaid totes underneath,


plus 2 beach chairs, a foldable table, and a 2.5 gallon water jug.


Friday, June 22, 2018

Our Fridge

One of the poorly functioning features in our VW Eurovan was the fridge.  The Winnebago models were equipped with Norcold 3 way, AC/DC/Propane, fridges which were notoriously problematic.  While camping on Cape Cod during the summer of 2015, I spoke to a fellow Eurovan owner who described the factory installed fridge as a "piece of shit."  I agreed.

Ours was no different so we started exploring alternatives.  GoWesty, the Calfiornia gurus for VW restorations recommended AC/DC fridges as did many others.  So we purchased an ARB 50 quart model through Amazon.
We loved it.  So when we bought the Transit and needed to select a fridge, we didn't hesitate to buy another ARB.  It draws very little current, so it was very kind to our dual battery system. We have run the fridge for 3 days without starting the engine once and still had plenty voltage in our battery system.  It is designed with an automatic shut off system so that it can't drain your battery beyond the level needed to start your engine.  It's easy to clean, it's big enough for extended camping trips and it is very easy to program and maintain specific temperatures.    It's really foolproof, WORTH EVERY PENNY!


However, the ARB would not fit into the space vacated by our Norcold, so we installed Go Westy's "Fridge-B-Gone" shelving system, which provided much needed storage.


We like the "Fridge-B-Gone" system so much that we duplicated it in our Transit.


In our Transit I wired the fridge directly to the dual batteries, an easy connection since those batteries are located under the driver's seat.


I purchased the ARB Fridge Wiring Kit from Amazon which makes it easy to either connect to your 12 volt battery or 110 volt power, and I mounted the 12V receptacle on the B pillar behind the drivers seat.

I mounted the 110V receptacle on wall behind the driver's seat and below.  

Thursday, June 21, 2018

Cabinets


Our cabinet footprint clearly followed the Westfalia design with just a few variations that were based on our personal preferences and habits.  We decided that we didn't need a built in stove or sink, we prefer to do cooking and eating outside, but we wanted plenty of counter space.

Our two years of camping with our Eurovan led us to replicate the GoWesty "Fridge-B-Gone" shelving unit which provides us with open shelves on which we could store bins of various sizes.


For our cabinets material we chose 3/4" baltic plywood and faced it with  1"wide poplar.  I used a Kreg pocket jig to join the surfaces and I finished the wood with Minwax polyurethane.  The Kreg pocket screws create an incredibly strong and tight joint...very sturdy.  


In order to attach the cabinets to the walls of the Transit I used 1/4" PlusNuts,which are easily mounted in the predrilled holes of the vans, and stainless steel button head screws to screwed into the PlusNuts.


Cleats were screwed across the backs of the cabinets at the proper height to line up with the PlusNuts.

Hanger bolts that have threaded woods screws on one end and bolt threads on the other were used to line up the PlusNut locations with the cleats on the backs of the cabinets.

We refer to this cabinet as "the hamper".  It opens on front and it is as deep as the floor of the van.  we use it to store sleeping bags, pillows, & our bottle jack.  Eventually we added a door which hinges at the bottom of the opening and is held closed with a magnet
.


Our 3rd cabinet, which we refer to as "the coffin", functions a lot like a blanket chest and is used to store a variety of items.  It opens from the top using a full length piano hinge to hold the lid in place.

"The coffin" is 15 inches deep. so the space below it is open and accessible from the rear of the van.


The lid on "the coffin" closely slowly with a single stay purchased through Amazon.

For a counter top, I used a single piece of 3/4" birch plywood and trimmed it with poplar just as I did with the cabinets.

After a few camping trips we decided we could add some additional storage by placing a small cabinet underneath the fridge.  The height of the fridge does restrict how far back the drivers seat can be tilted, so I had to experiment with the dimensions of this last cabinet.